Monday, June 27, 2011

CSA Harvest #5


Happy Day Everyone! It is with great pleasure that we introduce our greatest achievement to date and that is in the birth of our first child.. baby boy Tione (pronounced Sohneh) born June 20th at 8 pounds and 4 ounces. His name is a Kiribati name in honor of his Kiribati father and heritage and it means "gift from heaven".. we found the name very appropriate.

Life has been a bit chaotic since his arrival.. operating the farm on sleep deprivation has become the new routine and Asinete is on his own in the field for the time being until Mama heals up. We are more thankful than ever to our CSA support team M.A, Violet and Sally who are here every Wed to help harvest, wash and pack your baskets. Also thank you to our neighbor and good friend "Aunty Joo Joo" for helping with harvest while Mama is on the mend.

You are right to think it strange for farmer's to have a summer baby and we couldn't agree more! We had planned on a winter baby, a time of the year where we have time to put up our feet and enjoy the slower pace of life on the farm. But in the end Tione came when he was supposed to and we are just so happy he chose to come at all!

With the extra hubbub going on at the farm we have decided to hire someone once a week to help try to keep us from falling too far behind. We were fortunate to acquire the agrarian skills and gifts of Geronimo our Oaxacanian friend who comes and spends 9-10 hours a week with us. He has already taught Asinete quite a few tricks of the trade in the month he has been with us. We are grateful for his expertise and it sure is great to have another set of hands to battle the weeds that never give us a break, new baby or not.

As the summer crops draw nearer to harvesting next week we will be filling the now empty greenhouse with seed trays of fall crops. Kales, cabbages, broccoli, cauliflower, brussels sprouts and all the other yummy tastes of fall we love.

We hope your experience so far eating locally and in season has been a great one! We have many more veggies and fruits to tempt your pallets and your taste buds planned for the upcoming weeks.

Thank you for supporting this local(and now family)farm~

Suzie, Asinete, Baby Tione and the Crew

Harvest This Week Includes:

Fennel Bulb (try some recipe ideas below)

Nantes Carrots

Broccoli OR Cauliflower

Strawberries

Snow OR Snap Peas (freezing suggestions below if you'd like to save some of the bounty)

Head Lettuce

Cilantro

Cabbage (a very comical looking new variety we are growing called caraflex) Let us know what you think! It was bred this way to pack more easily. We hope it tastes good too!

How to Store it and Cook it!

Fennel~ love it or hate it we hope you give it a chance! Do not be offset by the smell and think it tastes like licorice. When prepared in one of the recipes below you will see too that the taste is like that of the most tender celery heart. Indeed fennel can be used in the place of celery in salads and other recipes. We hope you become a fennel lover too! The bulb keeps best wrapped in a plastic bag in the crisper drawer of fridge.

Oven Potatoes with Fennel

20 ounces Yukon Gold potatoes, cut in 1/2" cubes
1 medium fennel bulb, trimmed and cut in 1" slices
1 medium sweet onion, diced
1 tablespoon fresh parsley, minced finely
2 teaspoons vegetable oil
1/2 teaspoon salt
freshly ground black pepper -- to taste

Preheat oven to 400 degrees. Spray baking sheet with nonstick cooking spray. In large bowl, combine potatoes, fennel, onion, parsley, oil, salt and pepper; toss gently until well coated. Arrange mixture in a single layer on a prepared baking sheet. Bake, turning occasionally, until potatoes are crisp on all sides, 30-35 minutes. Serve immediately.

Fennel and Carrot Pasta

Ingredients

1 bulb fennel (about 1 pound)
4 ounces bow-tie, gemelli, or corkscrew pasta
2 large carrots, cut into thin strips (1 cup)
1/2 cup chopped onion
2 cloves garlic, minced
2 teaspoons olive oil
1/4 teaspoon pepper
1/8 teaspoon salt
1-1/2 cups shredded radicchio or fresh spinach
2 tablespoons grated Parmesan cheese

Directions

1.Remove upper stalks from fennel, including feathery leaves. Discard any wilted outer layers on fennel bulb; cut off a thin slice from the base. Wash fennel and pat dry. Quarter fennel bulb lengthwise and discard core; cut quarters in thin strips.
2.Cook pasta in a large pot of lightly salted boiling water for 5 minutes. Add fennel and carrots; cook for 5 minutes more or until pasta is al dente (tender but still firm); drain.
3.Meanwhile, in a small skillet cook onion and garlic in hot oil for 3 minutes or until onion is tender. Stir in pepper and salt. Transfer pasta mixture to a serving dish; add onion mixture, radicchio or spinach, and Parmesan cheese. Toss well to mix. Makes 4 side-dish servings.

How to preserve your snow/snap pea bounty for later in the season

It is that time of year again when the peas are coming in heavy, the big hurrah before the tender vines succumb to the summer heat and literally are killed off by it. We wanted to share with you a few easy steps you can take to freeze your peas for later use.
Your peas will need to be blanched before they can be frozen. Bring a large pot filled with water to boil on stove. Once water is boiling add the peas and boil for 90 seconds. Have a large bowl or pot ready nearby filled with ice cold water. After peas are blanched in hot water for 90 seconds immediately strain them and add strained peas to ice water for 90 seconds. Strain out cold peas and place in freezer bags (vacuum seal bags work best). Viola! You have your frozen peas ready to eat later this year.

Monday, June 13, 2011

CSA Harvest #3

Welcome to the third week of produce! Hopefully you have managed to keep up with the mass quantities of Spring roughage that has been coming your way.

We want to use this newsletter to introduce ourselves to some of you for the first time! We ran this post back in Jan of 2009 but wanted to dust it off and re post since our history has not changed! We are a husband and wife team farming 5 acres on the beautiful Umpqua floodplain! Here is our story....

Suzie's story.....2011 will be my 8th year of organic farming. I was born into a rural lifestyle in Orange County, Ca. in the beautiful coastal sage scrub hills and canyons of Trabuco. I grew up without electricity (home was too far away from town at the edge of Cleveland National Forest). While my parents had jobs away from "the ranch" there were always plenty of horses, pigs, chickens and goats to contend with, hills to climb, streams to forge and snakes to catch! Growing up surrounded by nature was a tremendous influence early on that directed my lifestyle and career choices. While away at college in the Monterey Bay I became involved in environmental restoration using Ca. native plants. I became an AmeriCorps intern and helped many other interns and volunteers to restore the former army base of Fort Ord back to it's native state (replanting old fire roads and abandoned artillery ranges with native plant species to increase biological diversity and prevent erosion). While in Monterey I also became involved in an organic educational farm in Salinas called ALBA. ALBA consists of more than 100 acres and is used as a school to help teach migrant farm laborers how to become independent business people, teaching students how to grow using organic methods and how to successfully market their products. I began to volunteer my extra time here helping students with their CSA programs. At ALBA while harvesting and working with the land I found my calling~ organic farming! I received my Bachelors of Science in environmental studies but did not know what I would do with it until my days at ALBA. From Monterey Bay I took a job as a school farm manager in a small town in South Monterey County called San Ardo. Here with the help of the community and school we were able to turn an abandoned 1 1/2 acres into a certified organic school/community farm. The students from K-8th attended weekly classes held at the farm in our outdoor classroom. Some classes were spent digging in the compost pile to learn about decomposing, other days measuring plant growth, some harvesting all the ingredients needed to make some salsa! It was a great place to learn more about organic farming and share the beauty of nature with children. In 2002 I decided to take a year trip overseas.. this led me to New Zealand (picking and packing kiwi fruit), into Australia (just a tourist), Fiji and then to the remote country of Kiribati (in between Australia and Hawaii on the equator) where I was teaching English for two and a half years and where I happened to meet my future husband and business partner Asinete Tibwe! We married in his country and arrived in Oregon together in the summer of 2007. My folks live in Myrtle Creek and told us what an amazing place Douglas County was... they were right!

Asinete's story~ 2011 will be my 4th year as an organic farmer. Before this I was a fisherman in my country since Kiribati is made up of small islands surrounded by the Pacific Ocean. The Kiribati people source almost all of their food from the sea. We catch and eat all sorts of fish (reef fish, shark, marlin, barracuda, and our favorite~ tuna!) Also we catch spiny lobster, octopus, eels and many kinds of shellfish. We catch fish in many ways. We dive for many species and use long spears to catch them. Sometimes we drag nets under the ocean and catch reef fish that way as well. Many people use the local canoe called a waa and they fish from here with nets or poles.
The country of Kiribati is made up of scattered coral atolls. The highest point of all islands is only one meter above sea level. We have no mountains or hills, lakes or rivers. Except for harvesting coconuts and a root like vegetable called babai (like taro root) my people are not farmers. I have learned how to grow all these crops in the USA (most of which I had never tasted before!) My favorite crop to grow is broccoli and sweet corn.. both of which I had never tasted before coming to the US. I love farming but miss my days of diving and fishing in the ocean! It helps that we live on the river though since when summer comes I can at least dive in the river and look for crawdads!


Thank you for supporting our dream here in Oregon!

Suzie & Asinete


This Week's Harvest Includes:

Green Garlic

Strawberries (eat these fast! With the rain they got wet and won't keep long)

Head lettuce

Snow OR Snap peas

Broccoli (hooray~ we had enough for everyone last week and this week!)

Spinach

Radish OR Salad Turnips

Mesclun Mix


How to Store it and Cook it~


Broccoli~ Enjoy this fleeting crop while it lasts. Last Spring we had a bumper crop of broccoli but this season as you already know we have had one problem after another keeping it alive... we are hoping for one or two good broccoli harvest soon and then the rest will come this Fall when the weather cools down again.

Broccoli stores best in a plastic bag in the crisper drawer of your fridge for best taste and most nutrients use within 3-5 days.
Broccoli is hailed as a wonder vegetable. It is packed full of phytonutrients that boost your body's immune power. It has been found in numerous studies to prevent cancer, cleanse and detoxify cells, prevent heart disease and cataracts, build up the density of bones and strengthen the immune system.

Skillet Browned Broccoli with Pan Toasted Garlic

ingredients

3 large broccoli stems with stem end attached
1/4 cup extra virgin olive oil
Coarse sea salt
Ground black pepper
3 Tbsp. thinly sliced garlic (use your green garlic!)

directions

1.Preheat a 12-inch cast-iron skillet over medium heat. Slice broccoli heads lengthwise in a 1-inch-thick slices, cutting from the bottom of the stem through the crown to preserve the shape of the broccoli (reserve any florets that fall away for another use). Brush both sides of each broccoli slice with some of the olive oil and sprinkle lightly with salt and pepper.

2.Place half of the slices in the heated skillet and set a heavy medium skillet on the slices to press them to the cast-iron skillet. Cook over medium heat for 3 to 4 minutes, or until well browned. Turn slices and cook second side for 3 to 4 minutes more or until browned (for more tender broccoli, cook over medium-low heat for 5 to 6 minutes per side). Repeat with remaining broccoli slices. Transfer to a warm platter, cover, and keep warm.

3.Drizzle the remaining olive oil into the hot skillet, reduce heat to medium-low and add garlic slices. Cook garlic, stirring gently and constantly for 2 minutes or until the slices are lightly browned. Transfer to a plate lined with paper towel and sprinkle lightly with salt and pepper.

4.Arrange broccoli on serving platter. Sprinkle the toasted garlic slices over broccoli. Makes 8 servings.

5.*Kitchen Tip: Keep cooked broccoli slices warm in a 300 degree F oven or cover with foil while the remaining broccoli cooks.


Radishes~

Do you have a hard time facing those radishes each week? Cooking them actually turns the heat into a sweet flavor. Try this out and see how you like it!

Braised Radishesadapted from Vegetarian Cooking for Everyone by Deborah Madison

1 bunch red radishes
1 to 2 Tablespoons butter
1 stalk green garlic, cleaned as you would a leek and chopped, use all the light green part
1/2 teaspoon chopped fresh thyme
Salt and pepper to taste

Trim the leaves from the radishes, leaving a bit of the green stems, and scrub them. Wash the leaves and set aside. Leave smaller radishes whole and halve the larger ones.

Melt 2 to 3 teaspoons of the butter in a small saute pan. Add the green garlic and thyme and cook for 1 minute over medium heat. Add the radishes, a little salt and pepper, and water just to cover. Simmer until the radishes are tender, 3 to 5 minutes. Add the leaves and cook until they're wilted and tender, 1 minute more. Remove the radishes to a serving dish. Boil the liquid, adding a teaspoon or two more butter if you like, until only about 1/4 cup remains. pour it over the radishes and serve.

Monday, June 6, 2011

CSA Harvest #2


Hooray for sunshine and warm weather! We have had to take advantage of it and get the eight varieties of peppers all planted as well as 250 eggplant plants. Unfortunately last Friday we had to replant the first batch of sweet corn since our first sowing done on May 13th all rotted due to the cold, wet ground. We probably won't have corn that is "knee high by the fourth of July" but we are hoping to get a total of 4-5 different plantings of sweet corn in so we can have it all summer. We know it is a favorite among the CSA members! When we attended an organic farming conference last winter we were surprised to learn that sweet corn and cole crops (broccoli, cabbage, cauliflower) are the two main crops that farmers lose money on. The main reason being that thye need so much fertilizer to grow as well as time to mature that many farmers will not bother with them. However we know for the CSA that they are a favorite item!

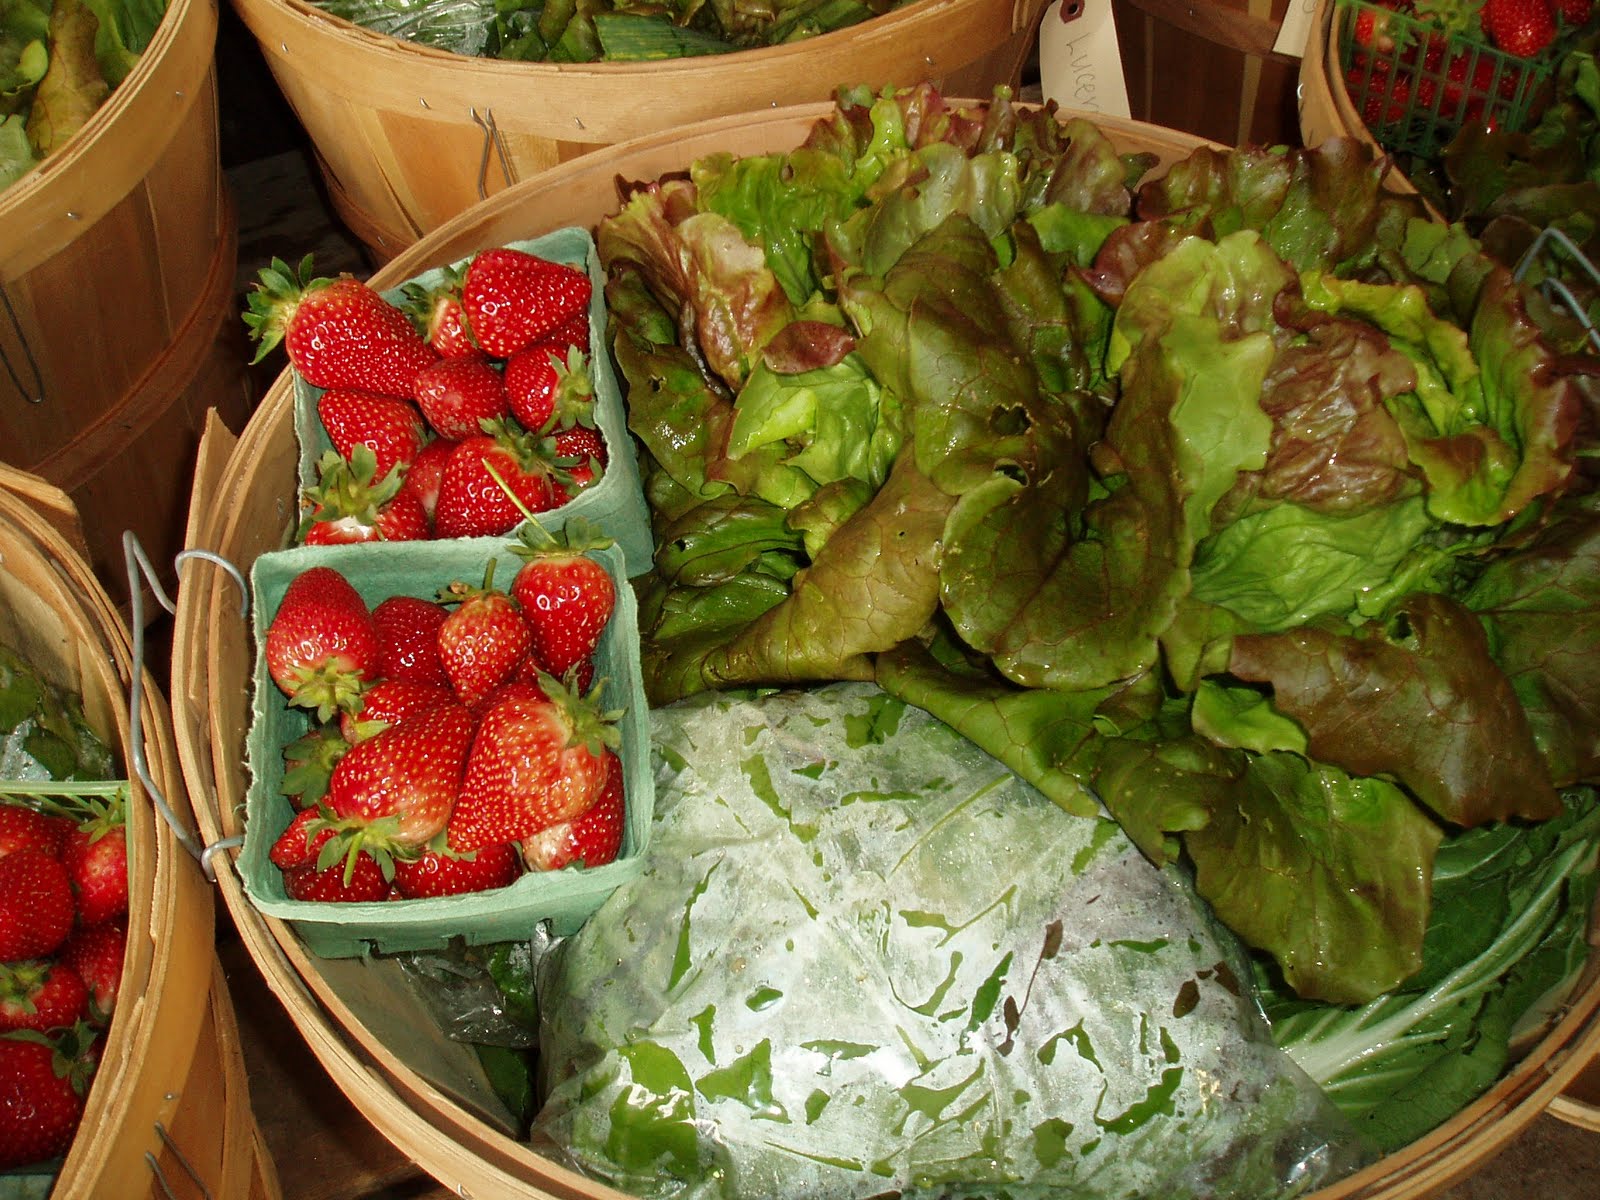
In other farm news we have been busy trying to keep up with the strawberries as they kick into high gear now with the weather warming up. Usually in the summer months strawberry harvesting takes up to 6 hours of our time each week. It is a slow process for us.. usually on hands and knees to be sure we don't miss any. Then we are sure to pop off any bad ones that the birds or slugs beat us too.. if they are not slimy we enjoy them ourselves to fuel our picking. Usually by the end of the strawberry harvest we are holding our berry swollen, aching bellies!

We hope you are all enjoying the tastes of late Spring from the farm! We look forward to meeting all of you at our upcoming farm tours and annual farm potluck!

Thank you for your support!

Suzie, Asinete and the Big Lick Crew: M.A, Violet and Sally


Harvest This Week Includes:

Rainbow Chard~ please see recipes from last week's newsletter!

Seascape Strawberries

Bok Choy~ more recipe ideas below

Spinach

Head Lettuce

French Breakfast Radishes

Snow OR Snap Peas

Broccoli (full Share only this week.. next week should be enough ready for all)


How to Store It and Cook It

Snow Peas and Snap Peas keep best in a plastic bag in the crisper drawer of your fridge. Their sweet sugars start turning to starch quickly so they taste best if you use them within two days. Both types of peas are high in Vitamins A and C. These peas are excellent prepared in dishes with your bok choy.. some ideas below!

Bok Choy with Peas
4-6 Servings Size

Ingredients:
1 tablespoon peanut oil
2 garlic cloves, finely minced
1 teaspoon grated fresh ginger
3/4 lb baby bok choy, leaves separated
1/2 lb peas
1/2 cup chicken stock (or vegetable stock if you wish to keep it vegetarian)
2 tablespoons oyster sauce
1/2 teaspoon sesame oil

Directions:
Prep Time: 15 mins

1 Add the oil, garlic and ginger into a wok or large saute pan. Turn the heat to medium-high. As the oil heats, the garlic and ginger will infuse the oil with flavor. Take care that they do not burn. When the oil is hot, add the bok choy and the peas and toss to coat them in the oil.
2 Stir-fry the mixture for about a minute. Add the stock and oyster sauce and bring to a boil. Cover and cook for 2 minute until the bok choy stems are crisp-tender. Drizzle the sesame oil over the mixture and serve.


Shrimp, Bok Choy and Peas Stir Fry
Ingredients:
1 cup long-grain rice
3 tablespoons oyster sauce
2 tablespoons soy sauce
1 tablespoon Chinese rice wine (or dry sherry)
1 tablespoon water
1 teaspoon sesame oil
½ tablespoon brown sugar
2 tablespoons peanut or canola oil
16 large uncooked shrimp—peeled
1 red pepper—julienned
1 bunch bok choy—leaves separated and chopped
16 snow peas or snap peas—trimmed and halved on the diagonal
2 cloves garlic—crushed


COOK the rice. MIX together the oyster sauce, soy sauce, Chinese rice wine, water, sesame oil and sugar in a small bowl. HEAT a wok or large frying pan over a high heat, add 1 tablespoon of the oil and stir-fry the shrimp for 2 minutes. REMOVE the shrimp from the wok and set aside on a plate. HEAT the remaining oil in the wok and stir-fry the red pepper for 2 minutes. ADD the bok choy and peas and stir-fry for 4 minutes. ADD the garlic and stir-fry for a minute, then return the shrimp to the wok. ADD the sauce mixture and mix to heat through. SERVE with rice.

Sunday, May 29, 2011

CSA Harvest #1 for 2011!!!


It is with great pleasure that we bring you the first CSA basket of the season! It has been a rough Spring for us as we explained in our long email to each of you. Last season seemed delayed enough but this season it rained all of March which is the usual time we get our ground worked up and our earliest crops started and in the ground (cauliflower, broccoli, cabbage, carrots, beets, potatoes, greens, herbs, onions, parsnips, radish and peas).

As organic farmers we are very mindful of how we treat the soil.. we know if we take care of it properly it will provide abundant crops for us. This is why we feed the soil and protect it from overwintering rains with cover crops like fava beans and clover that provide habitat for animals, protect the soil from erosion and when tilled into the ground in the Spring add nutrients and rich organic matter.

With that in mind earlier this Spring with a few days of sun and then a week of rain predicted after that we had to decide to finally get in and start working the ground even though it still seemed too wet. Several areas of the farm are loamy (almost sandy) and they tilled up fluffy and clod free. Other areas have more clay (which holds more water) and these areas looked good while we were tilling but then dried in huge clumps. The least favorite texture of soil we like to work with and the least favorite soil conditions for our plants to grow in! The soil texture also limits where we plant things. The softest, smoothest soil is where we focus planting the very small seeds like carrots, turnips and baby salad greens.

Even with this years delayed season we are still sticking with June 1st as the first delivery. We know several other CSA farmers who are delaying their first CSA harvest by 1 or 2 weeks.

We hope you understand that Spring time means greens and lots of them! Enjoy them now because when/if(?!) summer ever arrives the light greens will be replaced by hefty heirloom tomatoes, peppers, eggplants, potatoes, sweet corn and melons.

If you have trouble getting through the raw volume of greens try sauteing them up in one of the recipe ideas below.. they wilt down to a manageable size then!

We wanted to include a few pictures of the farm. There have been some big changes here this season... the biggest to come in the next few weeks.. the arrival of our new farm hand (eventually!) our baby boy due to arrive June 13th. We are expecting he will either come before or after that date though! Also with baby coming we finally took the plunge and bought a new tractor with all the necessary implements to farm with. We will be paying off this tractor monthly for the next five years but it was a wise investment considering the amount of time it will be saving us for years to come.

As the weather settles, warms and the sun shows its beautiful face again we will be hosting farm tours, and our annual potluck farm party in the late summer. We hope you can all make it at least once this season to see where the food you eat comes from!

Enjoy the bounty of the wet Spring and thank you for choosing to support local farmers!

Suzie, Asinete and the Big Lick Crew: M.A, Violet and Sally


Harvest this Week Includes:

Rainbow Chard

Pac Choi/Bok Choy

Spinach

Head Lettuce

Mesclun Mix

Hakurei Turnips (if you want still more greens tops are edible!)

Green Garlic


How to Store it, and Cook it!

Green Garlic~ green garlic can be used in a variety of ways.. it is good all the way up along the thick stalk and we even has someone at the farmers market say they were going to wrap the garlic leaves over their baked potatoes and the baked taters were heavenly.

Green garlic will store best in the crisper part of your fridge wrapped in a plastic bag. Be sure to wash well before using as sometimes grit can gather between the leaves.

Rice Bowl With Spinach and Green Garlic~ from NY Times

1 bulb green garlic, trimmed of stalk (save stalk for another recipe below!)

2 tablespoons extra virgin olive oil

1/2 pound scallions, white and light green parts only, finely chopped

Salt to taste

1 1/2 pounds baby spinach, stemmed and washed

1 tablespoon chopped flat-leaf parsley

1 tablespoon chopped fresh mint or tarragon

Freshly ground black pepper

Cooked brown rice or other grains of your choice for serving

1. If the garlic has formed cloves, separate them and remove the thick shells from the tender cloves. If it has not formed cloves, just remove the outside layers. Chop coarsely. You should have about 1/4 cup chopped green garlic. If using the pea shoots, sort through and discard any budding flowers or leaves and the thin ends with the tendrils. Wash thoroughly.

2. Heat the oil over medium heat in a large, heavy lidded skillet, and add the olive oil. Add the scallions, green garlic and a generous pinch of salt. Cook, stirring, until tender, two to four minutes. Working in batches, add the spinach or pea shoots and salt to taste. Turn up the heat, and toss with tongs until the spinach or pea shoots wilt enough to allow room for another batch. If using pea shoots, cover and steam two to four minutes. Spinach does not require covering; just toss in the pan until it wilts and is tender and fragrant. Add the parsley and mint or tarragon, season to taste with salt and pepper, and serve with brown rice or other grains of your choice.

Yield: Serves four.

Advance preparation: This dish is best served right after it’s made, but you can cook grains ahead and reheat.


Green Garlic Pesto

This pesto keeps very well, covered and chilled up to 3 days or frozen up to 2 months.

Prep Time: 30 minutes
Total Time: 30 minutes
Ingredients:
•1/2 pound green garlic
•1 Tbsp. vegetable oil
•1/2 tsp. salt, plus more to taste
•1/4 cup pine nuts
•1/4 cup extra-virgin olive oil
•1/4 cup freshly shredded pecorino cheese or other hard sheep's milk cheese
Preparation:
1.Trim and discard root ends of green garlic. Finely chop green garlic, rinse thoroughly and pat or spin dry.
2.In a large frying pan over medium-high heat, cook vegetable oil, green garlic, and 1/2 tsp. salt until soft, about 3 minutes. Let cool to warm room temperature.
3.In a blender or food processor, pulse pine nuts to chop. Set aside. Add green garlic and process, scraping down sides as necessary, until bright green and smooth. With motor running, drizzle in olive oil. Pulse in reserved pine nuts and cheese. Taste and add more salt if you like.

Makes enough Green Garlic Pesto to coat 1 pound linguine


Hakurei Turnips~ you've tasted turnips before and perhaps even shunned them but give these buttery gems a try and you too will be a turnip lover! These are a Japanese variety and the seed is pricey but worth it! We included turnip green recipes too!
Your turnips will keep best wrapped in plastic in the crisper drawer of fridge.

Creamed Turnips in Butter Sauce.
1.Slice the turnips very thin and chop the tops roughly. (I leave out the 2-3 inches of stem and the very top of the turnip bulb)
2.Place all in a pot with a little water (1/4 inch in pot) and boil until the turnips are tender and water is almost gone.
3.Turn off the heat and stir in 3/4 to 1 cup milk in the pot and season with salt and pepper to taste.
4.Add 1/2 teaspoon of dry chicken base.
5.Combine 3 T butter and 2 T flour in a microwave safe dish and microwave on high about 45 seconds until the mixture is bubbly.
6.Stir the flour and butter together and add to the pot. Cook and stir the mixture to make a light, buttery sauce.

White Hakurei Turnip Gratin

Melt 1 Tablespoon butter in a non-stick 12 inch skillet (make sure you have a top to fit the pan.)

Wash one bunch of white hakurei turnips well, top and tail them, and slice them in 1/4 inch slices. Save the turnip greens for another recipe. You don’t need to peel the turnips. Layer the slices in the pan. Sprinkle the sliced turnips with 1 teaspoon dry thyme, 3/4 teaspoon salt, 1/4 tsp. freshly ground pepper, and 1/8- 1/4 teaspoon cayenne pepper.

Cook for 3 minutes over medium heat, then pour 1/2 cup heavy cream and 1/2 cup chicken stock over the top. Cover and cook the turnips over medium heat for 20 minutes. The turnips will be completely cooked through, but there will be considerable liquid left in the pan. Remove the cover and cook to reduce the liquid. When most of the liquid has reduced (about 5-10 minutes), and the sauce is thickened, grate finely 1/2 cup of fresh parmesan cheese evenly over the top. Watch closely as the cheese melts and make sure that the liquid does not entirely cook away. Recipe credit: www.gfzing.com

Serve the turnips hot. The recipe is supposed to serve 6, but maybe realistically it would only serve 4, once they discover that they love turnips!


Mesclun Mix~ the mesclun mix in your CSA share is a zesty mix of young arugula, tatsoi, ruby streaks and purple orach mustard. We love these greens mixed in with the mild spinach and lettuce leaves in a salad. They are also great plopped onto your favorite sandwich. Store in the plastic bag in crisper drawer and try to use up within a week!

Mesclun Salad
Ingredients:
1 tablespoon fresh lemon juice
1/2 teaspoon Dijon mustard
1/4 teaspoon sugar
2 tablespoons olive oil
5 ounces mesclun mix(8 cups)

Preparation: Whisk together lemon juice, mustard, sugar, and 1/2 teaspoon salt in a large bowl until salt and sugar are dissolved, then add oil in a slow stream, whisking until emulsified.

Add greens to dressing and toss to coat. Serve immediately.

Rainbow Chard~ chard is chock full of vitamins and minerals and it is a great crop to grow on our farm since it keeps producing even after we harvest it once. Chard keeps best in a plastic bag in the crisper drawer (if you still have room in there!)

Rainbow Chard Bruschetta
ingredients
2 tablespoons olive oil
8 ounce Swiss chard, coarsely chopped (about 3 cups)
2 tablespoons water
Salt and pepper
1 tablespoon olive oil
1 tablespoon balsamic vinegar
6 slices French bread, cut diagonally 3/4-inch thick and toasted
1/2 cup torn arugula (this can be taken from your mesclun mix)
2 ounces garlic-and-herb feta cheese or plain feta cheese, crumbled (1/2 cup)

directions
In a large skillet or wok heat the 2 tablespoons olive oil; stir-fry Swiss chard over medium-high heat for 2 minutes. Add water and cook 2 minutes more. Add salt and pepper to taste. Remove from heat. In a small bowl combine the 1 tablespoon oil and the vinegar, set aside. To serve, divide chard among the pieces of toast. Drizzle with the oil-and-vinegar mixture. Top with arugula and feta cheese. Serve immediately. Makes 6 side-dish servings.


Garlic Creamed Chard

Per serving: 141 calories; 9 g fat (4 g saturated fat, 3 g mono unsaturated fat); 13 mg cholesterol; 10 g carbohydrates; 4 g protein; 2 g fiber; 369 mg sodium; 625 mg potassium Nutrition Bonus: Vitamin K (463% daily value), Vitamin A (140% dv), Vitamin C (35% dv), Magnesium (24% dv).

ingredients

1 tablespoon extra-virgin olive oil
1 pound chard, stems and leaves separated, chopped (see Note)
2 tablespoons minced garlic (use your green garlic!)
4 teaspoons unsalted butter
4 teaspoons all-purpose flour
2/3 cup low-fat milk
1/4 teaspoon salt
1/8 teaspoon freshly ground pepper
1/8 teaspoon ground nutmeg

directions

1.Heat oil in a Dutch oven over medium heat. Add chard stems and cook, stirring often, until softened, 3 to 5 minutes. Stir in chard leaves and cook, stirring constantly, until wilted, about 2 minutes. Cover and cook, stirring once, until tender, about 2 minutes more. Transfer to a colander placed in the sink and press with a wooden spoon to remove excess liquid. Return the chard to the pot, cover and keep warm.
2.Place garlic and butter in a small saucepan over medium heat and cook until the garlic is fragrant but not browned, about 2 minutes. Whisk in flour and cook until bubbling, about 30 seconds. Add milk, salt, pepper and nutmeg; cook, whisking constantly, until thickened, 1 to 2 minutes. Stir the chard into the sauce and serve immediately.
3.Note: After washing the chard for these recipes, allow some of the water to cling to the leaves. It helps steam the chard and prevents a dry finished dish.

recipe source
eatingwell


Bok Choy/Pac Choi~ Bok Choy is a unfamiliar vegetable to many of you but no longer! This Asian green is considered to have the highest amounts of calcium than any other vegetable. It is also an excellent source of Vitamin A, B complex, C and minerals. Like your other veggies it will keep best wrapped in damp towel or put in a plastic bag in crisper drawer of fridge. Only store for one week.

Stir Fry Bok Choy~ Thai Style

Prep Time: 10 minutes
Cook Time: 5 minutes
Total Time: 15 minutes
Yield: SERVES 4 as a Side Dish
Ingredients:
•2 heads of large bok choy
•1 Tbsp. coconut oil or other vegetable oil
•STIR-FRY SAUCE:
•2 Tbsp. oyster-flavored sauce (Vegetarians/Vegans: substitute vegetarian oyster-flavored sauce OR vegetarian stir-fry sauce)
•2 Tbsp. soy sauce
•2 Tbsp. fish sauce (Vegetarians/vegans: substitute 2 Tbsp. Thai Golden Mountain Sauce
•2 Tbsp. sweet Thai chili sauce (available in most supermarkets)
•2 Tbsp. brown sugar
•2 tsp. fresh lime juice
•7-8 cloves garlic, minced
Preparation:
1.Rinse the bok choy and cut off the bottom stem part at the base of each head. Separate into individual leaves. If the white sections of these leaves are very wide or large, you can slice them in half lengthwise, or into thirds. Tip: If stir-frying larger bok choy, slice off the green leaf tips. Add the thicker white sections to the wok first, then throw in the leaves at the end (these will cook very fast).
2.Mix all the stir-fry sauce ingredients together in a bowl or cup. Stir well to dissolve the sugar.
3.Heat a wok or large frying pan over medium-high to high heat for 30 seconds to 1 minute. Add oil and swirl around.
4.Now add the bok choy plus 2-3 Tbsp. stir-fry sauce. Stir-fry 1-2 minutes, or until pan/wok starts to become dry.
5.Now add another 2-3 Tbsp. sauce and continue stir-frying another 2-3 minutes, or until the bok choy is bright green and the white stems are softened but still crunchy.
6.Taste-test the bok choy with the sauce. Add more sugar if too sour for your taste, or more lime juice if too salty. Also, fresh minced chili or dried chili can be added if you prefer it spicier. If you prefer more sauce, add a little more, as desired.
7.To serve, lift out the bok choy and place on a serving platter or in a serving bowl, then pour the sauce (from the bottom of the wok or pan) over. Serve immediately with plenty of Thai jasmine-scented rice. ENJOY!
Stir-Fry Sauce Tip: Keep extra stir-fry sauce (in a covered jar or container) in your refrigerator for up to 1 month. This sauce is excellent with many different kinds of stir-fried vegetables, as well as with chicken, tofu or wheat gluten, pork, and seafood. Enjoy!

Garlic-Ginger Bok Choy Stir Fry

Bok Choy Recipe
Servings: 4
Ingredients:
1 1/2 pounds bok choy
1 1/2 tablespoons canola, vegetable or peanut oil
1-2 cloves garlic, finely minced
1 teaspoon grated fresh ginger
3 tablespoons broth or water (or 2 tablespoons broth/water + 1 tablespoon wine)
salt to taste
1/2 teaspoon sesame oil

Directions:
1. Start by trimming the stem off - don't trim too much - just the end. Cutting the thick stem off will ensure that the bok choy cooks evenly. Separate out the leaves, keep the tender center intact and clean under running water. Drain.

2. Finely mince garlic and grate fresh ginger with a microplane grater. Grating the ginger helps break up the tough fibers! (and yeah, sometimes when the ginger is nice and fresh, I don't even bother peeling off the paper-thin skin)

3. Place wok or frying pan on your stove and pour in the cooking oil. Add the garlic and ginger. Turn the heat to medium-high. Let the ginger and garlic gently sizzle in the oil. When the aromatics become fragrant and light golden brown, add the bok choy leaves. Toss very well to coat each leaf with the garlicky, gingery oil for 15 seconds. Pour in broth, water or wine. Immediately cover and let cook for 1 minute. Season with salt and drizzle a bit of sesame oil on top.

Sunday, November 21, 2010

CSA Harvest #26- the last of the season

Just in the nick of time we are wrapping up our 2010 CSA season! We saw on the weather report that Tuesday we are going to have a low of 16 degrees! This cold snap will kill off most of our fall crops that are left in the field. It will mean the end for any lingering cauliflower, savoy cabbage, broccoli and lettuce. Tuesday will find us busy still in the cold and wet trying to salvage all that we can before the killing frost comes. About the only things that should not die in weather that cold are our cover crops, kale, remaining brussel sprouts, green cabbage and leeks.

It seems so fitting that our last delivery each year falls on Thanksgiving week. A week that is dedicated to families coming together to share a wonderful meal. We hope that the produce in your baskets finds its way into your favorite dishes (or some new ones~ see below!) and satiates your friends and family that share your table.

We hope you all find so much to be thankful for!
Happy Holidays and we will see you in the Spring of 2011~

Suzie, Asinete, M.A., Violet and Sally (the Big Lick Crew)

Harvest For the Final Week:

Brussel Sprouts! yes they look funny! please pop them off the stem and use some of our recipe ideas below!

White or Purple Cauliflower (have too much? find out how to freeze it below)

Broccoli

Potatoes

Winter Squash (may be butternut, delicata, sunshine, green acorn)

Garlic

Head Lettuce

Rainbow Chard OR Beets (if you're a beet hater see if you can't find someone to trade with at pick up site! Or else give them another try.. these are smaller and more mild.)

Fennel (have you tried it roasted with parsnips, carrots, beets, potatoes yet? Or sliced thin on a salad)

Parsnips (we know we promised them for last week but they would not fit!)

Kohlrabi (the green, tennis ball looking things in your basket) recipe ideas below!

Cabbage

Green Tomatoes

Carrots (tops cut off to make room in baskets for all other loot)

red and yellow storage onions

How to get through it all and some recipe ideas that are Thanksgiving inspired:

Brussel Sprouts... if you think all brussel sprouts taste like old gym socks try these sweet gems. The majority of all store bought brussel sprouts are grown down in the central coast area of California where the weather does not get very cold. Brussel sprouts love cold weather though and the little sprouts are much sweeter and more tender when grown in our cooler climate. You may have been in Sherm's or Fred Meyer recently and seen that they too are selling many sprouts just like these, on the stalk. To use them simply pop them off the stem (even the little ones!) and use in some recipe ideas below. Brussel sprouts take a long season to get ready. We started these from seed back in June and still the sprouts are on the small side.

Brussel Sprouts with Bacon
serves 4

Ingredients
3 slices bacon, chopped
1 tablespoon extra-virgin olive oil, 1 turn of the pan
1 shallot, chopped
1 1/2 pounds Brussels sprouts, trimmed, small spouts left whole, larger spouts halved
Salt and pepper, to your taste
1 cup chicken broth
Directions
Brown bacon in a medium skillet over medium high heat. Remove bacon to a paper towel lined plate. Add extra-virgin olive oil to the pan, 1 turn. Add shallots to the pan and saute 1 to 2 minutes. Add Brussels spouts and coat in oil. Season with salt and pepper. Cook Brussels sprouts 2 to 3 minutes to begin to soften, then add broth. Bring broth to a bubble, cover and reduce heat to medium low. Cook 10 minutes, until tender. Transfer sprouts to a serving dish with a slotted spoon and top with cooked bacon bits.


Kohlrabi~ Kohlrabi is a strange vegetable.. less strange looking now since we removed all the large leaves from it to help it fit in your basket.The bulb part that you eat actually grows above ground. It can be eaten raw or cooked but does need to be peeled first. To peel use a sharp knife and cut right under green skin to reveal white flesh inside. Kohlrabi might look like a turnip when peeled but it is actually related to cabbage and broccoli tasting like a cross between the two. Kohlrabi is not only tasty but good for you as well! It is high in antioxidants, fiber and Vitamin C...peeled, raw and cut into wedges it is a wonderful addition to your Thanksgiving crudites platter!

Roasted Kohlrabi with Garlic and Parmesan Cheese
Original Recipe Yield 4 servings
Ingredients
4 kohlrabi bulbs, peeled
1 tablespoon olive oil
1 clove garlic, minced
salt and pepper to taste
1/3 cup grated Parmesan cheese
Directions
1.Preheat an oven to 450 degrees F (230 degrees C).
2.Cut the kohlrabi into 1/4 inch thick slices, then cut each of the slices in half. Combine olive oil, garlic, salt and pepper in a large bowl. Toss kohlrabi slices in the olive oil mixture to coat. Spread kohlrabi in a single layer on a baking sheet.
3.Bake in the preheated oven until browned, 15 to 20 minutes, stirring occasionally in order to brown evenly. Remove from oven and sprinkle with Parmesan cheese. Return to the oven to allow the Parmesan cheese to brown, about 5 minutes. Serve immediately.


Preserving your Cauliflower abundance for later use

Remove all leaves off of cauliflower. Cut head into 2 inch florets and wash clean. Be on the lookout for slugs and or slug poo which wash off easily in cold water. Add the clean florets to a pot full of boiling water. Boil for three minutes and remove promptly. Put immediately into sink full of cold water to stop cooking process. When cool drain cauliflower well in colander and when dry place in freezer bags and freeze for later use!

Tuesday, November 16, 2010

CSA Harvest #25

Twenty five weeks?? I just typed that into the title of this week's blog and it seems so surreal! How can it be that 25 weeks of the CSA year have gone by already? The end of each season is bittersweet. The thought of not greeting most of you every Wednesday is gloomy! The silver lining however is that we have time to regroup, to relax and plan for how the next season will be even better.

We feel fortunate that even with the tough growing season we had in the early part of the year we were still able to keep the produce pumping out. We were fortunate too in that our Fall has been mild so far. If we had had a hard frost by now it would have really limited the amount of produce you have been getting in your baskets these last few weeks... but as it is watch out!! We are planning on going out with a loud kabOOM! These last two deliveries we are going to load your baskets to the brim and hope the fruits of our extensive harvest list are able to fit in your baskets.

Thank you to each of you who filled out the CSA Survey for 2010. Because each season is different we get different responses at the end of each year. Some universal favorites were the sweet corn, strawberries, raspberries, potatoes, garlic, red peppers, lettuce and even (shock!!) kale!! Some of the un favorites that we saw more than once were beets and fennel. Sadly we will have at least one more harvest of fennel. If you haven't tried it sliced up and roasted with carrots, potatoes and parsnips you need to... the fennel bulb tastes just like the tender heart of celery.

In terms of the drop off time/ day and location only 1 person out of 70 said it was not a good day or time.. the rest said it was perfect for them. There is nothing we can do about the time of day since it takes us all day to pick, wash, pack and load up the truck. Also the day of the week works perfectly with our harvest schedule for farmers market (gives enough time in between harvests for crops to size up).

All in all with the survey results it seems like more than 95% of you were very happy with the CSA program this year. We always have a small turnover. Families that have never tried a CSA program before and realize at the end of the first year it is not for them. Many people want to choose what items they buy and that is completely understandable! If you were one of these people don't forget that you can also support us at Farmer's Market in Roseburg from April-October.. we appreciate all the support we can get.

Farming is not a lucrative career but what it lacks in monetary gain it makes up for in friendships, a strong back and work ethic and the unwavering feeling that the work you are doing is making a difference.

Thank you for allowing us that opportunity!

Harvest This Week Includes:

Baby Carrots

Parsnips (last of them! try roasted with carrots and potatoes)

Winterbor Kale OR Bok Choy

Purple or White Cauliflower

Broccoli

Leeks

Onion

Green Tomatoes (let sit at room temp to ripen or use green)

Garlic

Potatoes

Delicata Winter Squash

Parsley OR Cilantro


Recipe Ideas:

Delicata Delish~ serves 4

Ingredients

* 1 large delicata squash, halved lengthwise and seeded
* 3 tablespoons butter, divided
* salt and pepper to taste
* 1 cup uncooked quinoa
* 2 cups water
* 2 shallots, chopped
* 1 clove garlic, minced
* 1/3 cup pine nuts

Directions

1. Preheat oven to 350 degrees F (175 degrees C).
2. Arrange the squash halves cut side up in a baking dish. Fill dish with about 1/4 inch water. Place 1 tablespoon butter on each half, and season halves with salt and pepper. Cover dish, and bake squash 30 minutes in the preheated oven, or until very tender.
3. Place quinoa in a pot with 2 cups water. Bring to a boil. Reduce heat to low, cover, and simmer 15 minutes.
4. Melt the remaining 1 tablespoon butter in a skillet over medium heat. Stir in shallots and garlic, and cook until tender. Stir in pine nuts, and cook until golden. Gently mix into the pot with the cooked quinoa.
5. Cut the squash halves in half, and fill each quarter with the quinoa mixture. Serve each stuffed squash quarter on a bed of the remaining quinoa mixture.

Nutritional Information open nutritional information

Amount Per Serving Calories: 379 | Total Fat: 17g | Cholesterol: 23mg


Delicata and Garlic~ serves 8
Ingredients

* 3 delicata squash (if you don't have 3 please adjust recipe)
* 1/4 cup olive oil
* 3 cloves garlic, minced
* 1/2 cup chopped fresh parsley

Directions

1. Preheat oven to 375 degrees F. Oil a 9x13 inch baking dish.
2. Peel delicata squash, slice in half lengthwise, and remove seeds. Cut into 1/2 inch thick slices. Place in baking dish, and toss with olive oil, garlic, and parsley.
3. Bake in preheated oven for 30 minutes, or until tender.

Nutritional Information open nutritional information

Amount Per Serving Calories: 120 | Total Fat: 6.8g | Cholesterol: 0mg

Tuesday, November 9, 2010

CSA Harvest #24~ 2 more!!

Brrrrrr!!! It seems like fall is really here to stay now and we are eager to get some of the beauties of the fall harvest put in your baskets before the frost gets to them first. This week we delve into the butternut squash (our favorite!). If you have been with us for a few seasons now you know we have always had quite a bit more winter squash in the baskets compared to this year. The problem we had this year was slugs got to the winter squash before we could get them harvested. We never knew the amazing eating ability of a slug until we saw large butternuts that were just empty shells, all the flesh inside eaten out by the fat slugs. Next year we will plant more to compensate for slug damage. Also we just may decide to go into the escargot business (after all slugs must be easier to eat then snails since they are already out of their shell.) Hey don't knock a good protein source! Plus they go down real smooth!

We have heard back from some of you that Monday, November 22nd will be the best day for the last delivery and we agree! Delivery will be at the same time (after 5pm) just on Monday. For the last delivery it is very important that you bring bags or a box to place the contents of your basket into since we will need all baskets back at this point for next season. This is the best time to bring back any baskets you may have at home as well!

Don't worry we will remind you about all this next week as well!

Until then, stay warm, safe and enjoy these beauties of Fall!!

Harvest This Week Includes:

Violet Queen Cauliflower

Butternut Squash

Garlic

Savoy Cabbage

Head Lettuce

Bell peppers (the last of 'em either rejoice or savor!)

Potatoes

Green Tomatoes (either leave at room temp in your kitchen or use some recipe ideas below!)

Onion


How to use it!

Thank you to CSA member Beth Houseman for passing on some recipe ideas for green tomatoes. If you don't want to eat them green just leave out at room temp and they will ripen.

This recipe is from my Uncle Jules (Julie) Korn, who passed away this year.

Pickled Green Tomatoes

4 lbs green tomatoes
1 heaping tsp pickling spices, per jar
1 garlic clove, sliced, per jar
1 tsp canning salt, per jar
4-6 cup vinegar
4-6 cup distilled water
(can add hot peppers)

1. Prepare jars, lids, etc.
2. Heat equal parts vinegar and water to boiling (approximately 3/4 cups each per jar to start)
3. Add salt, spices, and garlic to each jar
4. Prepare tomatoes, slice into halves or quarters (if necessary) and pack tightly into jars
5. Pour boiling liquid over tomatoes and let settle. Keep adding liquid until filled to top, may take 30 minutes as tomatoes absorb. When cool, cover lid with plastic wrap and tighten band. Invert on towel and let sit a few hours. When cool, refrigerate. Ready to eat when color turns (dull light green).

I did can some, in water bath for 15 minutes (then turn off heat, let sit in water 10 min, then remove from canner).

Fried Green Tomato BLT

* 3 green tomatoes, sliced 1/4 inch thick
* 2 eggs
* 1/2 cup whole milk
* 3 cups canola oil
* 1/2 cup flour
* 3 tablespoons cornmeal
* 2 teaspoons salt
* 1 1/2 teaspoons freshly ground pepper
* lettuce
* 4 slices bread
* 4 slices bacon, cooked
* mayonnaise
* salt and pepper

Procedures

1.Pour the oil into a small pot. Heat it to 365 degrees. Preheat the oven to 225 degrees. Place a wire rack on a sheet pan in the oven.

2. Crack the eggs into a small bowl. Pour in the milk and whisk together. In another small bowl combine the flour, cornmeal, salt, and pepper.

3.Dredge the pieces of slices of green tomatoes one at a time in the flour mixture, shake off any excess, and then toss in the egg wash to coat, and then transfer back to the flour mixture.

4. Toss the pieces in the hot oil, and cook for 2 minutes on each side. When done place the fried tomatoes in the oven on the wire rack.

5. Construct the sandwiches. Slather the pieces of breads with mayonnaise. Sprinkle with salt and lots of pepper. Top with bacon, lettuce, and the fried green tomatoes. Top with the other slice of bread.


Butternut Info

NUTRITION

Butternut squash is a well-balanced food source that is rich in complex carbohydrates and low in saturated fat and sodium. It is a very good source of vitamins A and C and a good source of beta-carotene, magnesium, manganese, calcium and potassium.

Roasted Winter Squash Soup

Prep Time:
30 Min
Ready In:
1 Hr

Servings 4


Original Recipe Yield 4 cups

Ingredients

* Roasted Winter Squash:
* 2 tablespoons butter
* 2 cups raw winter squash (butternut, hubbard, acorn)
* Salt and pepper

* Soup:
* 2 tablespoons extra-virgin olive oil
* 1/2 cup diced onion (1/4-inch)
* 1/4 cup diced celery (1/4-inch)
* 1/4 cup diced carrot (1/4-inch)
* 1 cinnamon stick
* Sea salt and freshly ground pepper
* 32 ounces chicken broth
* 1/2 teaspoon ground toasted coriander (optional)
* Roasted Winter Squash (above)
* 1/2 cup half-and-half, if desired* (optional)
* 2 tablespoons toasted pumpkin seeds
* 1/2 cup plain Panko crispy bread crumbs, toasted light brown in saute pan over medium heat

Directions

1. To make roasted winter squash: Heat oven to 375 degrees F. Heat butter over medium-high heat in an ovenproof saute pan; add diced squash, salt and pepper. When squash begins to brown, place pan in oven. Roast for 15 minutes or until medium-brown on all sides. Remove from oven and let cool slightly. Puree in food processor, or mash with potato masher or ricer. Measure 1 1/2 cups squash; reserve.
2. To make soup: Heat the olive oil in a large saucepan over medium heat until hot. Add the onion, celery, carrot and cinnamon stick; saute until soft but not brown, about 10 minutes. Season with salt and pepper. Add the broth and the coriander; bring to a boil. Simmer for several minutes. Stir in reserved squash until smooth; simmer gently to let the flavors meld, about 10 minutes. Discard the cinnamon stick.
3. Puree the soup using an immersion blender or in a blender until smooth. (The soup can be made ahead to this point, cooled, covered, and refrigerated for several days or frozen for about 1 month. It will thicken as it cools and may need thinning with broth or water when reheating.)
4. Return the soup to the pan and reheat gently. Add the half-and-half. Adjust the seasoning with salt and pepper. Top each serving with pumpkin seeds and toasted bread crumbs.


Butternut Squash Soup with Ravioli
ingredients

* 2 pounds butternut squash
* 2 14-1/2-ounce cans vegetable broth
* 1/2 cup water
* 1/8 teaspoon cayenne pepper
* 1 tablespoon margarine or butter
* 1 9-ounce package refrigerated cheese ravioli
* 1 tablespoon molasses (optional)

directions

1. Peel squash. Halve lengthwise. Remove seeds and discard. Cut squash into 3/4-inch pieces.
2. In a large saucepan, combine squash, broth, water, and cayenne pepper. Cook, covered, over medium heat for 20 minutes or until squash is tender.
3. Transfer one-fourth of the squash-and-broth mixture to a blender container. Carefully blend, covered, until smooth. Repeat until all of the mixture is blended.
4. Return blended mixture to large saucepan. Bring just to boiling. Immediately reduce heat. Simmer, uncovered, for 5 minutes. Add the margarine or butter, stirring until just melted.
5. Meanwhile, prepare the ravioli according to package directions. Drain. Ladle hot squash mixture into bowls. Divide cooked ravioli among bowls. If desired, drizzle with molasses. Makes 5 side-dish servings.
6. < Make-Ahead: Prepare soup as directed, except do not add ravioli. Cool soup. Transfer to an airtight container. Store in the refrigerator up to 2 days or label and freeze for up to 2 months. To reheat, transfer frozen soup to a large saucepan. Cook, covered, over medium-low heat for 15 to 20 minutes or until heated through, stirring often. Cook ravioli as directed and serve with soup as directed.

Violet Queen Cauliflower

To enjoy the beauty of this cauliflower with it's vibrant colors it is best to eat raw in salad or used as a base for dips. Also tasty roasted. Cut into florets and coat with olive oil and kosher salt. Spread on cookie sheet and bake at 350 degrees for 25 mins or 'til done.