Monday, June 27, 2011

CSA Harvest #5


Happy Day Everyone! It is with great pleasure that we introduce our greatest achievement to date and that is in the birth of our first child.. baby boy Tione (pronounced Sohneh) born June 20th at 8 pounds and 4 ounces. His name is a Kiribati name in honor of his Kiribati father and heritage and it means "gift from heaven".. we found the name very appropriate.

Life has been a bit chaotic since his arrival.. operating the farm on sleep deprivation has become the new routine and Asinete is on his own in the field for the time being until Mama heals up. We are more thankful than ever to our CSA support team M.A, Violet and Sally who are here every Wed to help harvest, wash and pack your baskets. Also thank you to our neighbor and good friend "Aunty Joo Joo" for helping with harvest while Mama is on the mend.

You are right to think it strange for farmer's to have a summer baby and we couldn't agree more! We had planned on a winter baby, a time of the year where we have time to put up our feet and enjoy the slower pace of life on the farm. But in the end Tione came when he was supposed to and we are just so happy he chose to come at all!

With the extra hubbub going on at the farm we have decided to hire someone once a week to help try to keep us from falling too far behind. We were fortunate to acquire the agrarian skills and gifts of Geronimo our Oaxacanian friend who comes and spends 9-10 hours a week with us. He has already taught Asinete quite a few tricks of the trade in the month he has been with us. We are grateful for his expertise and it sure is great to have another set of hands to battle the weeds that never give us a break, new baby or not.

As the summer crops draw nearer to harvesting next week we will be filling the now empty greenhouse with seed trays of fall crops. Kales, cabbages, broccoli, cauliflower, brussels sprouts and all the other yummy tastes of fall we love.

We hope your experience so far eating locally and in season has been a great one! We have many more veggies and fruits to tempt your pallets and your taste buds planned for the upcoming weeks.

Thank you for supporting this local(and now family)farm~

Suzie, Asinete, Baby Tione and the Crew

Harvest This Week Includes:

Fennel Bulb (try some recipe ideas below)

Nantes Carrots

Broccoli OR Cauliflower
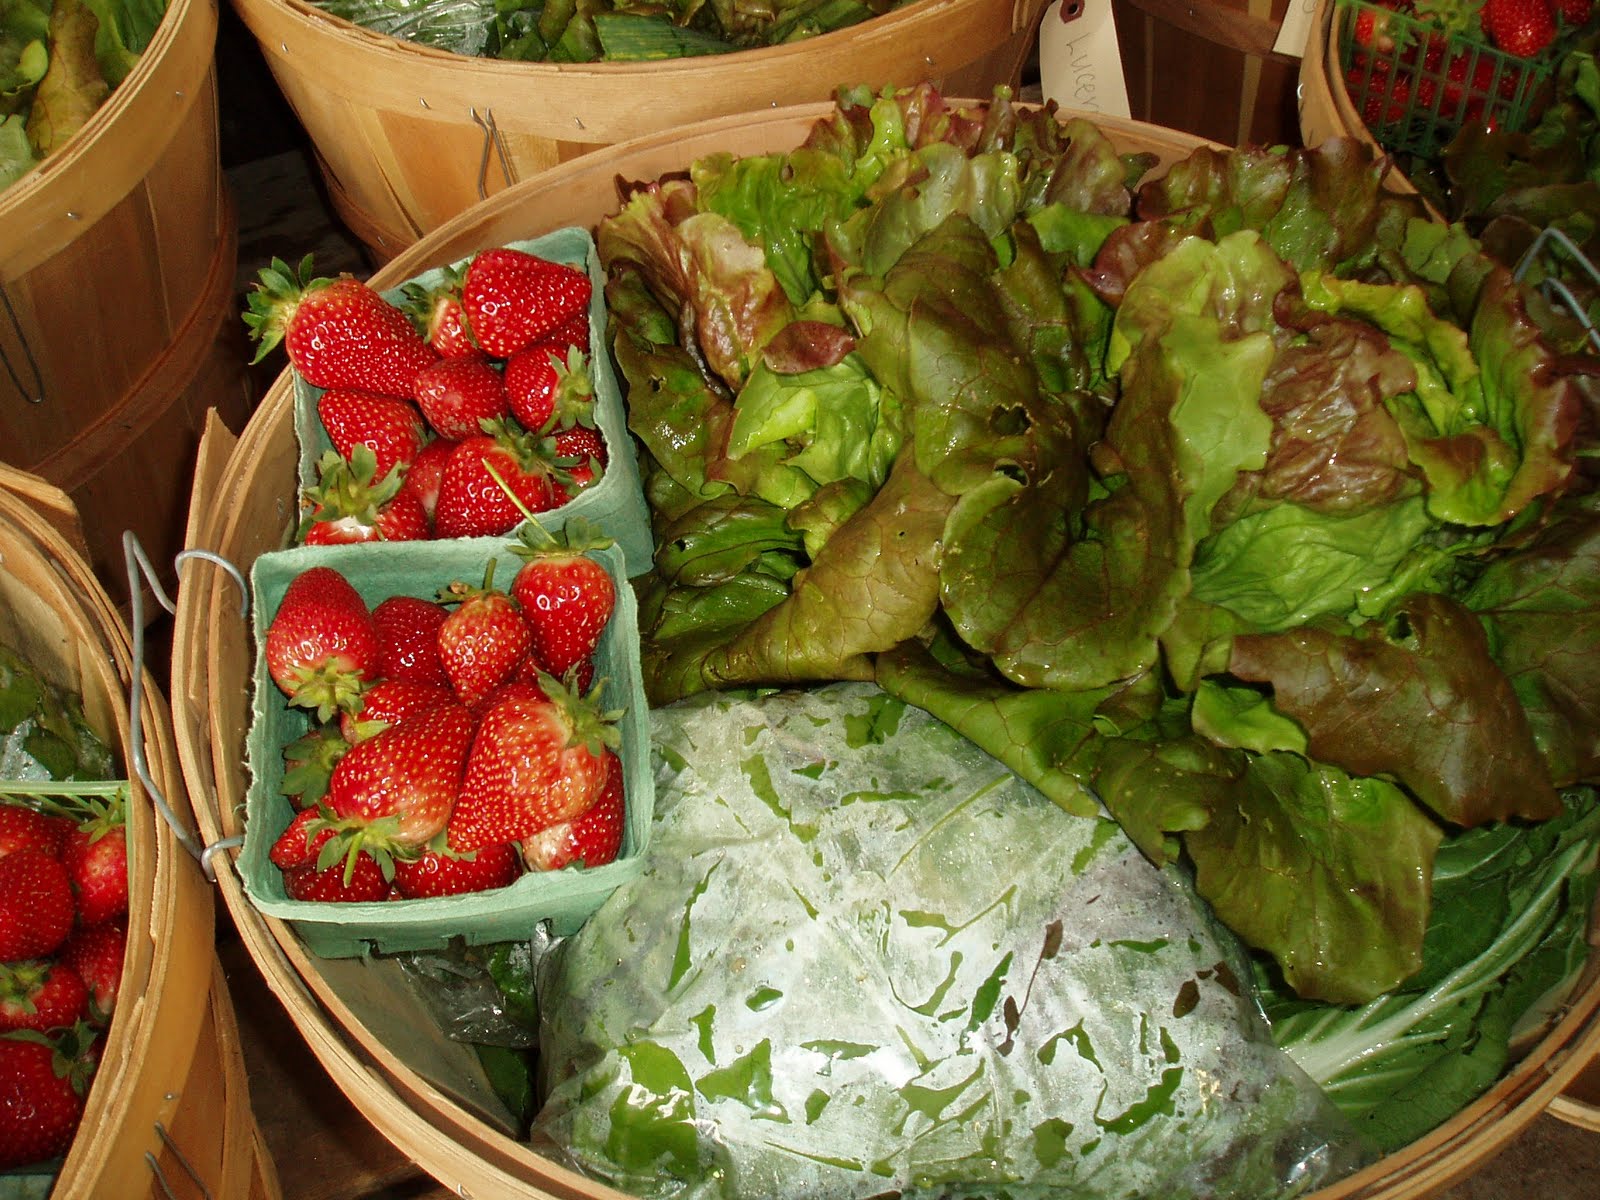
Strawberries

Snow OR Snap Peas (freezing suggestions below if you'd like to save some of the bounty)

Head Lettuce

Cilantro

Cabbage (a very comical looking new variety we are growing called caraflex) Let us know what you think! It was bred this way to pack more easily. We hope it tastes good too!

How to Store it and Cook it!

Fennel~ love it or hate it we hope you give it a chance! Do not be offset by the smell and think it tastes like licorice. When prepared in one of the recipes below you will see too that the taste is like that of the most tender celery heart. Indeed fennel can be used in the place of celery in salads and other recipes. We hope you become a fennel lover too! The bulb keeps best wrapped in a plastic bag in the crisper drawer of fridge.

Oven Potatoes with Fennel

20 ounces Yukon Gold potatoes, cut in 1/2" cubes
1 medium fennel bulb, trimmed and cut in 1" slices
1 medium sweet onion, diced
1 tablespoon fresh parsley, minced finely
2 teaspoons vegetable oil
1/2 teaspoon salt
freshly ground black pepper -- to taste

Preheat oven to 400 degrees. Spray baking sheet with nonstick cooking spray. In large bowl, combine potatoes, fennel, onion, parsley, oil, salt and pepper; toss gently until well coated. Arrange mixture in a single layer on a prepared baking sheet. Bake, turning occasionally, until potatoes are crisp on all sides, 30-35 minutes. Serve immediately.

Fennel and Carrot Pasta

Ingredients

1 bulb fennel (about 1 pound)
4 ounces bow-tie, gemelli, or corkscrew pasta
2 large carrots, cut into thin strips (1 cup)
1/2 cup chopped onion
2 cloves garlic, minced
2 teaspoons olive oil
1/4 teaspoon pepper
1/8 teaspoon salt
1-1/2 cups shredded radicchio or fresh spinach
2 tablespoons grated Parmesan cheese

Directions

1.Remove upper stalks from fennel, including feathery leaves. Discard any wilted outer layers on fennel bulb; cut off a thin slice from the base. Wash fennel and pat dry. Quarter fennel bulb lengthwise and discard core; cut quarters in thin strips.
2.Cook pasta in a large pot of lightly salted boiling water for 5 minutes. Add fennel and carrots; cook for 5 minutes more or until pasta is al dente (tender but still firm); drain.
3.Meanwhile, in a small skillet cook onion and garlic in hot oil for 3 minutes or until onion is tender. Stir in pepper and salt. Transfer pasta mixture to a serving dish; add onion mixture, radicchio or spinach, and Parmesan cheese. Toss well to mix. Makes 4 side-dish servings.

How to preserve your snow/snap pea bounty for later in the season

It is that time of year again when the peas are coming in heavy, the big hurrah before the tender vines succumb to the summer heat and literally are killed off by it. We wanted to share with you a few easy steps you can take to freeze your peas for later use.
Your peas will need to be blanched before they can be frozen. Bring a large pot filled with water to boil on stove. Once water is boiling add the peas and boil for 90 seconds. Have a large bowl or pot ready nearby filled with ice cold water. After peas are blanched in hot water for 90 seconds immediately strain them and add strained peas to ice water for 90 seconds. Strain out cold peas and place in freezer bags (vacuum seal bags work best). Viola! You have your frozen peas ready to eat later this year.

Monday, June 13, 2011

CSA Harvest #3

Welcome to the third week of produce! Hopefully you have managed to keep up with the mass quantities of Spring roughage that has been coming your way.

We want to use this newsletter to introduce ourselves to some of you for the first time! We ran this post back in Jan of 2009 but wanted to dust it off and re post since our history has not changed! We are a husband and wife team farming 5 acres on the beautiful Umpqua floodplain! Here is our story....

Suzie's story.....2011 will be my 8th year of organic farming. I was born into a rural lifestyle in Orange County, Ca. in the beautiful coastal sage scrub hills and canyons of Trabuco. I grew up without electricity (home was too far away from town at the edge of Cleveland National Forest). While my parents had jobs away from "the ranch" there were always plenty of horses, pigs, chickens and goats to contend with, hills to climb, streams to forge and snakes to catch! Growing up surrounded by nature was a tremendous influence early on that directed my lifestyle and career choices. While away at college in the Monterey Bay I became involved in environmental restoration using Ca. native plants. I became an AmeriCorps intern and helped many other interns and volunteers to restore the former army base of Fort Ord back to it's native state (replanting old fire roads and abandoned artillery ranges with native plant species to increase biological diversity and prevent erosion). While in Monterey I also became involved in an organic educational farm in Salinas called ALBA. ALBA consists of more than 100 acres and is used as a school to help teach migrant farm laborers how to become independent business people, teaching students how to grow using organic methods and how to successfully market their products. I began to volunteer my extra time here helping students with their CSA programs. At ALBA while harvesting and working with the land I found my calling~ organic farming! I received my Bachelors of Science in environmental studies but did not know what I would do with it until my days at ALBA. From Monterey Bay I took a job as a school farm manager in a small town in South Monterey County called San Ardo. Here with the help of the community and school we were able to turn an abandoned 1 1/2 acres into a certified organic school/community farm. The students from K-8th attended weekly classes held at the farm in our outdoor classroom. Some classes were spent digging in the compost pile to learn about decomposing, other days measuring plant growth, some harvesting all the ingredients needed to make some salsa! It was a great place to learn more about organic farming and share the beauty of nature with children. In 2002 I decided to take a year trip overseas.. this led me to New Zealand (picking and packing kiwi fruit), into Australia (just a tourist), Fiji and then to the remote country of Kiribati (in between Australia and Hawaii on the equator) where I was teaching English for two and a half years and where I happened to meet my future husband and business partner Asinete Tibwe! We married in his country and arrived in Oregon together in the summer of 2007. My folks live in Myrtle Creek and told us what an amazing place Douglas County was... they were right!

Asinete's story~ 2011 will be my 4th year as an organic farmer. Before this I was a fisherman in my country since Kiribati is made up of small islands surrounded by the Pacific Ocean. The Kiribati people source almost all of their food from the sea. We catch and eat all sorts of fish (reef fish, shark, marlin, barracuda, and our favorite~ tuna!) Also we catch spiny lobster, octopus, eels and many kinds of shellfish. We catch fish in many ways. We dive for many species and use long spears to catch them. Sometimes we drag nets under the ocean and catch reef fish that way as well. Many people use the local canoe called a waa and they fish from here with nets or poles.
The country of Kiribati is made up of scattered coral atolls. The highest point of all islands is only one meter above sea level. We have no mountains or hills, lakes or rivers. Except for harvesting coconuts and a root like vegetable called babai (like taro root) my people are not farmers. I have learned how to grow all these crops in the USA (most of which I had never tasted before!) My favorite crop to grow is broccoli and sweet corn.. both of which I had never tasted before coming to the US. I love farming but miss my days of diving and fishing in the ocean! It helps that we live on the river though since when summer comes I can at least dive in the river and look for crawdads!


Thank you for supporting our dream here in Oregon!

Suzie & Asinete


This Week's Harvest Includes:

Green Garlic

Strawberries (eat these fast! With the rain they got wet and won't keep long)

Head lettuce

Snow OR Snap peas

Broccoli (hooray~ we had enough for everyone last week and this week!)

Spinach

Radish OR Salad Turnips

Mesclun Mix


How to Store it and Cook it~


Broccoli~ Enjoy this fleeting crop while it lasts. Last Spring we had a bumper crop of broccoli but this season as you already know we have had one problem after another keeping it alive... we are hoping for one or two good broccoli harvest soon and then the rest will come this Fall when the weather cools down again.

Broccoli stores best in a plastic bag in the crisper drawer of your fridge for best taste and most nutrients use within 3-5 days.
Broccoli is hailed as a wonder vegetable. It is packed full of phytonutrients that boost your body's immune power. It has been found in numerous studies to prevent cancer, cleanse and detoxify cells, prevent heart disease and cataracts, build up the density of bones and strengthen the immune system.

Skillet Browned Broccoli with Pan Toasted Garlic

ingredients

3 large broccoli stems with stem end attached
1/4 cup extra virgin olive oil
Coarse sea salt
Ground black pepper
3 Tbsp. thinly sliced garlic (use your green garlic!)

directions

1.Preheat a 12-inch cast-iron skillet over medium heat. Slice broccoli heads lengthwise in a 1-inch-thick slices, cutting from the bottom of the stem through the crown to preserve the shape of the broccoli (reserve any florets that fall away for another use). Brush both sides of each broccoli slice with some of the olive oil and sprinkle lightly with salt and pepper.

2.Place half of the slices in the heated skillet and set a heavy medium skillet on the slices to press them to the cast-iron skillet. Cook over medium heat for 3 to 4 minutes, or until well browned. Turn slices and cook second side for 3 to 4 minutes more or until browned (for more tender broccoli, cook over medium-low heat for 5 to 6 minutes per side). Repeat with remaining broccoli slices. Transfer to a warm platter, cover, and keep warm.

3.Drizzle the remaining olive oil into the hot skillet, reduce heat to medium-low and add garlic slices. Cook garlic, stirring gently and constantly for 2 minutes or until the slices are lightly browned. Transfer to a plate lined with paper towel and sprinkle lightly with salt and pepper.

4.Arrange broccoli on serving platter. Sprinkle the toasted garlic slices over broccoli. Makes 8 servings.

5.*Kitchen Tip: Keep cooked broccoli slices warm in a 300 degree F oven or cover with foil while the remaining broccoli cooks.


Radishes~

Do you have a hard time facing those radishes each week? Cooking them actually turns the heat into a sweet flavor. Try this out and see how you like it!

Braised Radishesadapted from Vegetarian Cooking for Everyone by Deborah Madison

1 bunch red radishes
1 to 2 Tablespoons butter
1 stalk green garlic, cleaned as you would a leek and chopped, use all the light green part
1/2 teaspoon chopped fresh thyme
Salt and pepper to taste

Trim the leaves from the radishes, leaving a bit of the green stems, and scrub them. Wash the leaves and set aside. Leave smaller radishes whole and halve the larger ones.

Melt 2 to 3 teaspoons of the butter in a small saute pan. Add the green garlic and thyme and cook for 1 minute over medium heat. Add the radishes, a little salt and pepper, and water just to cover. Simmer until the radishes are tender, 3 to 5 minutes. Add the leaves and cook until they're wilted and tender, 1 minute more. Remove the radishes to a serving dish. Boil the liquid, adding a teaspoon or two more butter if you like, until only about 1/4 cup remains. pour it over the radishes and serve.

Monday, June 6, 2011

CSA Harvest #2


Hooray for sunshine and warm weather! We have had to take advantage of it and get the eight varieties of peppers all planted as well as 250 eggplant plants. Unfortunately last Friday we had to replant the first batch of sweet corn since our first sowing done on May 13th all rotted due to the cold, wet ground. We probably won't have corn that is "knee high by the fourth of July" but we are hoping to get a total of 4-5 different plantings of sweet corn in so we can have it all summer. We know it is a favorite among the CSA members! When we attended an organic farming conference last winter we were surprised to learn that sweet corn and cole crops (broccoli, cabbage, cauliflower) are the two main crops that farmers lose money on. The main reason being that thye need so much fertilizer to grow as well as time to mature that many farmers will not bother with them. However we know for the CSA that they are a favorite item!

In other farm news we have been busy trying to keep up with the strawberries as they kick into high gear now with the weather warming up. Usually in the summer months strawberry harvesting takes up to 6 hours of our time each week. It is a slow process for us.. usually on hands and knees to be sure we don't miss any. Then we are sure to pop off any bad ones that the birds or slugs beat us too.. if they are not slimy we enjoy them ourselves to fuel our picking. Usually by the end of the strawberry harvest we are holding our berry swollen, aching bellies!

We hope you are all enjoying the tastes of late Spring from the farm! We look forward to meeting all of you at our upcoming farm tours and annual farm potluck!

Thank you for your support!

Suzie, Asinete and the Big Lick Crew: M.A, Violet and Sally


Harvest This Week Includes:

Rainbow Chard~ please see recipes from last week's newsletter!

Seascape Strawberries

Bok Choy~ more recipe ideas below

Spinach

Head Lettuce

French Breakfast Radishes

Snow OR Snap Peas

Broccoli (full Share only this week.. next week should be enough ready for all)


How to Store It and Cook It

Snow Peas and Snap Peas keep best in a plastic bag in the crisper drawer of your fridge. Their sweet sugars start turning to starch quickly so they taste best if you use them within two days. Both types of peas are high in Vitamins A and C. These peas are excellent prepared in dishes with your bok choy.. some ideas below!

Bok Choy with Peas
4-6 Servings Size

Ingredients:
1 tablespoon peanut oil
2 garlic cloves, finely minced
1 teaspoon grated fresh ginger
3/4 lb baby bok choy, leaves separated
1/2 lb peas
1/2 cup chicken stock (or vegetable stock if you wish to keep it vegetarian)
2 tablespoons oyster sauce
1/2 teaspoon sesame oil

Directions:
Prep Time: 15 mins

1 Add the oil, garlic and ginger into a wok or large saute pan. Turn the heat to medium-high. As the oil heats, the garlic and ginger will infuse the oil with flavor. Take care that they do not burn. When the oil is hot, add the bok choy and the peas and toss to coat them in the oil.
2 Stir-fry the mixture for about a minute. Add the stock and oyster sauce and bring to a boil. Cover and cook for 2 minute until the bok choy stems are crisp-tender. Drizzle the sesame oil over the mixture and serve.


Shrimp, Bok Choy and Peas Stir Fry
Ingredients:
1 cup long-grain rice
3 tablespoons oyster sauce
2 tablespoons soy sauce
1 tablespoon Chinese rice wine (or dry sherry)
1 tablespoon water
1 teaspoon sesame oil
½ tablespoon brown sugar
2 tablespoons peanut or canola oil
16 large uncooked shrimp—peeled
1 red pepper—julienned
1 bunch bok choy—leaves separated and chopped
16 snow peas or snap peas—trimmed and halved on the diagonal
2 cloves garlic—crushed


COOK the rice. MIX together the oyster sauce, soy sauce, Chinese rice wine, water, sesame oil and sugar in a small bowl. HEAT a wok or large frying pan over a high heat, add 1 tablespoon of the oil and stir-fry the shrimp for 2 minutes. REMOVE the shrimp from the wok and set aside on a plate. HEAT the remaining oil in the wok and stir-fry the red pepper for 2 minutes. ADD the bok choy and peas and stir-fry for 4 minutes. ADD the garlic and stir-fry for a minute, then return the shrimp to the wok. ADD the sauce mixture and mix to heat through. SERVE with rice.